
Articles > Technique > Starting Ski Touring
Although ski touring (aka ski de randonnée or back country skiing) and off-piste skiing are both practised away from the groomed slopes they are quite different sports. The ski-tourer relies on his, or frequently her, own efforts to get to the start whereas the off-piste skier will use the ski-stations lifts maybe with small climbs, either on foot or more frequently these days, with climbing skins. There is, therefore considerable overlap in the two disciplines, the principal difference is that off-piste skiers will use gear much closer to downhill equipment both in weight and performance and will frequently be close to civilization and immediate help.
The ski-tourer requires different equipment that is somewhat of a compromise between ski and mountaineering gear. Bindings may not have all the release possibilities of downhill equipment and boots are lighter and more flexible. For the ski tourer the climb up to the summit or pass is frequently the greater pleasure with the skis being simply a convenient and fast way to return to the car or overnight refuge.
You should have at least a good three weeks piste skiing under your belt, this should have been acquired with group lessons or an instructor where proper technique is learnt. It is hard to learn to ski by touring alone, it is a simple question of altitude. In 20 days of intensive piste skiing including time getting used to skis on the nursery slopes a skier will cover on average 100,000 meters. Thats the same as very serious ski tourers will cover over the whole season or an amateur over four or five years. Its a bit of a paradox, you want to enjoy the freedom of the mountains but you have to start by queuing for the lifts like everyone else. For people who really dont want to do this there is a solution, forget skiing and buy some snow shoes. These will give you direct access to the mountains, and all the dangers that they hold!
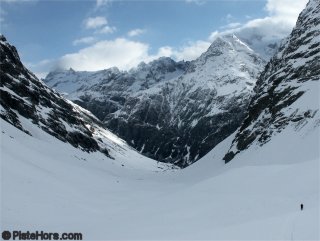
If you can already ski, that is you can take a red piste from the top to the bottom of the resort, including moguls and ice, then you should try some off-piste first. At the same time, if the snow is good, you can attempt some of the easier ski-touring routes.
If you are already a good off-piste skier but only within the environs of the ski station then there is no problem. However take it easy to begin with. Off-piste in the station is normally undertaken only when the snow is good, something you will only find with luck, or experience, in the mountains. More often than not the snow is frozen with ruts and ice-balls. You will also be descending after an ascent of some hours with a heavy rucksack and equipment that is less secure than that used on-piste. Get it wrong and a pleasant day out can quickly turn into an epic.
Basically there are four possibilities:
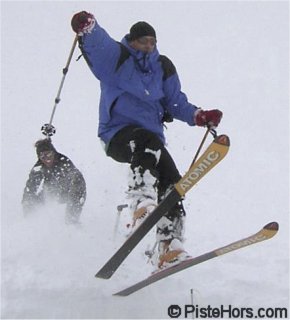
Your skis should be fairly light, wider than normal and not too long. The introduction of what can be loosely dubbed freerando skis have rewritten the rules. With their large spatulas they can be skied much shorter, choose a ski around your own height to 10cm shorter. This will save weight too. The Dynastar Legend 4800 and Atomic Ambition? are good examples of this type of ski, they don't sacrifice as much as a pure touring ski in performance and are relatively light class, something that is important when you are climbing. The main thing against shaped skis for touring use are finding suitable skins and the fact that the edges will not grip as well as straighter skis on traverses, particularly on harder snow.
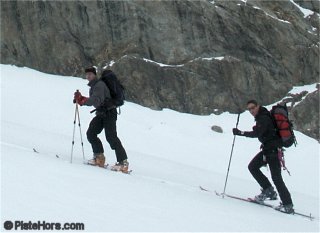
Things are getting shorter, [[Gear/approach skis], such as the Kong Grimpeur and Rossignol Freestyle are no bigger than a pair of snow shoes. They adapt for various types of fixations, even snowboard boots. We are even experimenting with a pair of Decathlon Wed'ze mounted with Dynafit bindings for use in tight terrain.
You can use the same poles that you use on the piste if you change the baskets. Piste baskets are okay on a bashed piste but will disappear into powder. Telescopic poles arent strictly necessary and dont always work that well, however they are easier to carry on a rucksack.
Comfortable and warm ski-boots are okay for the first few sorties. Randonée boots are a cross between hard shell mountaineering boots and ski boots. They are lighter, more flexible and will have avibram-type sole for walking. If you are desperate to buy proper boots then the model depends on your ability: a good skier on all types of snow will be okay with lightweight randonée boots but they dont hold feet well on descents, an average skier needs boots that will. Recommended for beginners on a budget are the Nordica TR12. A thermoformable inner boot is a good addition, at a price, being both warmer and lighter than the standard inner boot. More demanding skiers may like to consider the Scarpa Matrix or the Garmont Mega Ride G-Fit and Garmont Adrenalin or Scarpa Tornado, the latter two approach downhill boots in performances.
Ski touring bindings have two positions. Hinged for climbing and fixed for the descent. In the climbing position the heel is free and ski can easily be slid forward. Some bindings require special boots and this needs to be considered. Another possibility is the rando-clip, a free heeled binding that clips into normal ski binding for the ascent and is then stowed in the ruck-sack for the descent. This is a cheap way of getting into the sport but is not that well thought of by the experts but they probably wear hair shirts too! The main disadvantage, apart from being laughed at, is the weight of the bindings in the rucksack. For step-in/step-out convenience consider the Dynafit, Naxo and Silvretta Pure range of bindings. They can be combined with a pair of lightweight downhill skis to be used equally on the piste. You will get curious looks from the gapers though. These bindings all have a weight penalty which is a problem for longer tours. Experts figure that a kilogramme on the foot is the same as three in the rucksack. Lighter bindings exist, the Dynafit Comfort is around 750 grammes and the Dynafit Tourlite Tech at 600 grammes. The Dynafit bindings are positively skeletal but still release well enough for ski touring use and are very robust.
Skins are attached beneath the ski with glue. These can either be synthetic or Mohair. Synthetic will last longer but Mohair slides better. The skins stop the ski from slipping backwards when ascending, they are removed for the descent, the ski cleaned of glue, some people also apply wax but this is not entirely necessary. Tradition has it that the skins should be applied the evening before, ether at home or in the warmth of the refuge. They dont always want to stick at 6am at 20 degrees below and trust me, there is nothing worse. Parabolic skis can have skins shaped to fit. Colltex sell three types of shaped skins and they claim they fit over 50 ski types. Pomoca make skins specially for certain models of parabolic skis. You can also by wide straight skins that you cut with a sharp knife.
When the snow is hard crampons (harscheisen or couteaux) can be attached to the bindings, including the rando-clip type. Crampons are no substitute for skins and should only be fixed where necessary, certainly not 10 metres from the car-park! Again buy the crampons to match the binding. It is advisable to fit crampons sooner rather than later. There is nothing worse than trying to put your crampons on in the middle of a 35 degree, icy traverse. The new Diamir Explore binding and the Dynafits let you fix crampons without removing boots, if you are flexible enough.
There is obviously an avalanche risk with ski touring and everyone in the group should equiped with Avalanche Transceivers. A transceiver will enable a buried skier to be located in less than 15 minutes where the same search with probes would have taken 2 hours. It is vitally important to rescue people within the first quarter of an hour. Studies show the chance of surviving an avalanche halves every hour a victim is buried. Avalanche probes (basically a thin, robust, collapsible stick) enable the victim to be located exactly and a lightweight shovel is needed to dig them out.
Recent information indicates that some of the newer transceivers with digital readout of direction and distance are affected by GSM mobile phones. It is advisable to turn off any other electronic equipment when making a search.
Crampons and an ice axe are useful on glacial terrain. A 40 metre 7 mm climbing rope, prussiks and harness are necessary when travelling on glaciers.
Clothing is a question of a number of lightweight layers. There is a considerable temperature differential between ascent, summit and descent. One minute you may be ascending in a south facing couloir, without wind, where the relative temperature can reach 30 C. An hour later you may be on the summit in cloud with the thermometer hovering at 15 below, with a 60 km/h breeze this may give a windchill of minus 50 C!
Legs: two layers, a Goretex or Sympatex outer that will be stashed in the rucksack for the ascent and lightweight trousers or tracksuit bottoms
Torso: three layers, a vest, a fleece and a lightweight Goretex ski jacket. The vest should be of a wickable fabric and I always take a second to change into at the summit. The fleece and jacket will often stowed in the rucksack for the ascent.
You will need a hat or a balaclava. Mine is in a polartec material and can be worn as a hat as well. Sun-glasses, these should have 100% UV protection and side shades. I take an inner glove of polartec material with reinforced palms and outer glove of goretex.
You will want a survival sheet or bivvi bag per person and for the group a small first aid box and tools for bindings etc.
For a day trip in spring at least one litre of water per person, Isostar or a weak orange juice mixture with salt added.
A 1/25000 map, altimeter and compass. You should know how to use the later. GPS are less useful as they consume batteries at a fast rate. If you carry one make sure it is set for the same coordinate system as the maps you are using. If you have an approximate idea of which quadrant you are in you should only need to read the last few digits to get your exact position.
For a day tour 30 litres is enough. It should have side straps so that skis can be carried easily. The alternative is to carry the skis held by the top flap. But this does not help the balance on delicate sections. Crampon points should be covered.
Ski-tourers think in terms of altitude not distance, the distance covered is much less important than the height. This is even true if you regularly practise an endurance sport such as running, cycling or in-line skating.
Ascending on skis and skins uses different muscle groups in different ways to other sports. For a first outing 600 metres on easy ground is sufficient. Take your time, dont go too fast, youll regret it the next day or on the descent. You are not in a race but trying to familiarise yourself with the technique and equipment. The ascent should take a couple of hours.
The next two sorties should be around 800 metres. After that, if you dont have too many aches and pains just a few blisters, you should be able to judge your own progression. At the end of the season 1,500 metres shouldnt be a problem, and on a tour including refuge, this should make the majority of alpine ranges accessible.
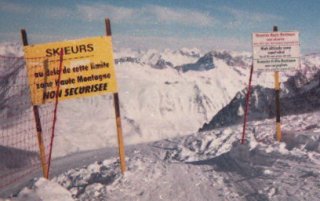
Yes but you should put this in context. On average there are around 30 deaths through avalanches per year in France. This figure has remained pretty much constant for the last 20 years. During the same period the number of people skiing in resorts has grown tenfold and free-riding and ski touring have become much more popular. In any one year 30 people die from insect bites in France and three times that number die in summer swimming on the south coast. Statistically you are more likely to be killed driving to the slopes than on them. Falls are another danger. Be very careful on steep slopes in the winter or in the spring where snow may melt then refreeze as ice overnight.
You can minimise the risk by following certain rules.
Always consider that there isnt a friendly pisteur or first aid post around the corner. You have to be self sufficient. A fall and a twisted wrist is a lot more serious.
When you first start, always do up and down tours not loops or traverses. That way you will be able to study the terrain you will ski back over and follow your own tracks. Assuming snow or wind hasnt covered them over. Take a compass and map! In the spring never set off too late in the day - in May you will often need to start at least an hour before sunrise in order to encounter good snow on the way down. Not too hard but not too soft with the risk of full depth avalanches.
Ski well within your limits, falls are definitely verboten! Away from civilisation loosing a ski or fracturing something is very serious. You need to be a bit of an acrobat, if you do fall make sure you can stop and recover quickly. If you are the kind of person who normally slides to the bottom of the piste like a bug on its back maybe you need some more practise.
Avalanches, you need the nine lives of a cat to understand all their secrets. At a bare minimum phone the local avalanche centre for a risk assessment and tie this in with your chosen route. Pay attention to the weather and recent snowfall remember that the wind deposits snow on leeward slopes forming wind slabs. These may be covered by fresh snow and a particularly dangerous. You can dig a test pit to reveal the bonding of snow layers but this may not be representative of the rest of the slope. Winter cornices are also not amusing to tumble through.
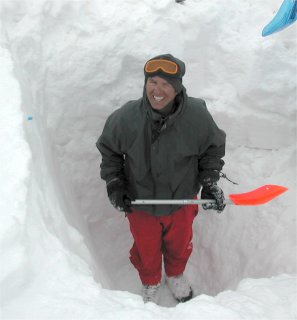
Watch out for other winter traps, crevasses and bergschrund or rimayes at altitude, covered fissures in limestone ranges such as the Chartreuse and Flaine. Streams, fence posts and barb wire just below the surface on pastures.
As the old saw goes "You dont choose the snow, the snow chooses you." On a typical ski tour you will often encounter several different types of snow.These are the different conditions you may come across, in ascending order of difficulty.
With a bit of planning you can minimize the chances of encountering difficult conditions. Obviously just after snowfall you will come across powder on all slopes. If the weather stays cold (zero isotherm in the valley floor) these conditions can persist for several days, even a week. However the powder on sunny slopes will begin to settle and transform. If the weather warms up - frequently the case below 2500 meters even in the winter in the French Alps the surface of the snow on South, then West and East facing slopes will melt then refreeze at night. In the first few days this will form a breakable crust, on slopes that face directly South this will melt during the day but on other slopes you may need to wait for the crust to become thick enough to ski without breaking through. Usually the North facing slopes will guard their powder until the next snowfall.
If their is considerable wind snow will be stripped from windward slopes leaving a hard, icy surface, often with small ridges that are a pain to ski. When the snow lands, on lee slopes, the crystal structure will break down and again hard slabs may be found. These are the cause of the famous windslab although slabs can form elsewhere on the mountain.
In the Spring, if skies are clear, all slopes except very sheltered North-facing couloirs will freeze then thaw around mid-morning giving excellent skiing. It is just a case of finding the right slope for the time of day. If conditions are cloudy then there may be no overnight refreeze. Slopes will be skiable but there is a greater risk of wet snow avalanches. There is also a great risk from rock and serac fall and snow bridges over crevasses will be weaker.
One of the beauties of ski or snowboard touring is that you are not constrained by lift opening times and the traditional ski season. There are people who ski tour every month of the year although it is true that the snow in July and August, even high on glaciers, is not the best. Generally the touring season gets underway with the first snows of the autumn, this is usually sometime towards the end of October. Remember that thin, early season snow-packs are not necessarily free from the risk of avalanche as many backcountry travelers have found to their cost. The winter season is ideal for finding fresh powder, both touring and off-piste skiing or boarding. It is also a time for staying tucked up around a warm stove in a refuge and benefiting from relatively late starts. It is also the season when the risk of avalanche and poor weather are greatest. Spring snow is a joy in itself, often easier to ski than the finest piste. The downside is that starts are often around 4 to 5 am and it can get blisteringly hot during the day. Avalanche risks and the risk from slides are not negligible, especially at altitude where the conditions can still approach those of winter.
Parts of this article are based on information from Volodia Shahshahani, a Grenoble based ski mountaineer and author/editor of many excellent guide books for the region.
<< Glacier Travel for Skiers and Snowboarders | Technique | Toponeige Ratings >