Articles > Servicing Skis and Snowboards
When you are out on the pistes as much as we are in a season you either dont have time or cant afford to drop your skis or snowboard into the shop to get them serviced or repaired. It is undoubtedly true that the backcountry, particularly at the start or end of the season, can be pretty tough on bases. We've been servicing our own kit for a number of years but were also lucky enough to recently be invited to watch one of Vola's top ski technician in action.

The tools of the home ski technician
Before applying wax you need to check the base condition. There is no need to repair every minor scratch and scrape but any hole in the base that penetrates to the core, and any nicks by the edges should be repaired immediately to avoid moisture damaging the core of the ski or board. Given a few tools this job is not as daunting as it sounds.
While the professional tools made by companies such as Vola, Toko or Swixmake life easier a skier should have the following in his repair kit:
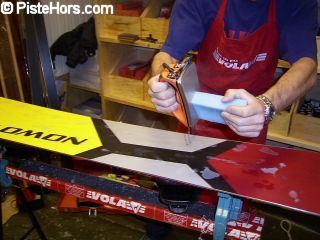
Clamp the ski in a soft vice or workmate and release the brake. Any nicks or gouges to be filled should be cleaned of wax they can be repaired by lighting a P-Tex candle and letting the molten P-Tex drip into the gouge. Bonding can be helped by heating the base a bit with a soldering iron. There will be some work to do to remove excess P-Tex once it has solidified. The ideal tool for this is a Perspex scraper, you can get a smooth finish with the base fairly easily. A file can also be used but be very careful about damaging the base! You can get extra wide plastic scrapers for boards but generally the same scraper you use for skis will work.

Remove excess P-Tex with a scraper
A P-Tex gun somewhat simplifies the process but they are quite expensive at around 150 and you will still need to remove some excess P-Tex with a scraper. Glue guns can be found in hardware shops that take P-Tex candles and they are much cheaper than P-Tex guns. But the do not run hot enough to properly melt the P-Tex, the plastic will not stick to the base. With a bit of electronics knowledge it is possible to change the resistance to make them run hotter. Alternatively a soldering iron can be used to melt the P-Tex and smooth the surface.
After excess material has been removed you can use very fine sandpaper and a sanding block to smooth off the surface. Be very careful, ski bases should flat, although some wide skis are a little concave at tail and tips. Snowboards present a much larger width and even more care is needed.

Finish the ski base with a sanding block
Any old iron was the cry of England's Rag and Bone men but shouldn't become the leitmotif of the home ski technician. Certainly steam irons are out. Many people use a cheap travel iron, but professional irons costing around 50 are a sound purchase, particularly when you set that against a 600 pair of skis. The principal advantage with a ski iron is that it maintains a much more accurate temperature than a home iron, plus it won't accidentally get used on your new shirts! The temperature point is a serious one, with skis and boards using ever more exotic materials there is a danger of damaging the internal structure.

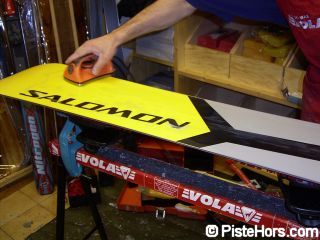
Applying wax to a snowboard
If you use a domestic iron select the lowest temperature setting to avoid overheating the skis. Melt wax along the ski then iron in. Ideally you should reapply hot wax every day - many resorts have an amusingly named salle de fartage for the purpose. Otherwise cold wax treatments, in the form of aerosols are available.

Waxing Skis
You can remove excess wax with a flexible plastic or metal scraper or simply by skiing a bit. If you are intending to climb with skins excess wax should be removed beforehand otherwise it will ruin the glue on the skins. When you get skis out of your hotel, refuge or car they will be warm. If you jump straight on the skis the warm wax will be removed immediately. You should leave them base down on the snow so they can acclimatise before skiing them.

Waxing Snowboards
Wax is normally available in a number of temperature ranges. Unless you are competing the quality of wax is not that important. It is better to buy a general ski wax in a large quantity. I generally use a hard (low temperature wax). This will still work in warmer conditions and we are not talking about racing in precise conditions and looking to shave a few hundredths of a second of our time.
Dont remove P-Tex with a knife or razor as you will cut into the bases. If you damage the bases in this way it will be an expensive repair in a ski shop to fix.
At the end of the season, wax the bases with a thick layer and leave this on the edges to stop them rusting. Slacken off the bindings and apply grease. Do not store with the skis locked together by the brakes as the skis will lose their spring.
Edge sharpening is not tricky. Again the skis will need to be held firmly. You then need a file held in a special right angle clamp, these are available from ski shops. Different angles are available for different types of usage but for general skiing or boarding 90 degrees is appropriate. You may also want to refer to the manufacturer's original specification. A tip is to colour the edge of the ski with a felt tip pen along its whole length. Work along the edge in short strokes gradually lengthening them, until you finish with a single stroke at the point where there is no more pen mark left on the edge. Don't press too hard. Burrs should be removed with a polishing stone and some people blunt the edge close to the tips to make turning easier although this is not that necessary with modern carving skis.
You may need to remove some of the plastic of the ski in order to sharpen edges.
Normally the intersection of the metal edge with the base forms an angle of around 1 to 0.5 degrees. The manufacturers website should give you exact figures. This is the edge bevel and makes the ski easier to turn. There are special guides, similar to the edge sharpening tools mentioned to achieve this angle and these are recommended. Alternatively wrap a few turns of masking tape around the file. Then file the edge of the ski with the masking tape on the base of the ski at a constant distance from the edge.
Of course, you may decided to just give your skis or board to a shop to tune once a year out of season when they are not busy and have a bit of time and enthusiasm and just do waxing and minor reparis and tuning the rest of the time.

If you want to know more the Waxing and Care of Skis and Snowboards. The 120 detailed pages tell you all you need to know in some detail. The book is available from Amazon:0899973035 or Amazon-UK:0899973035
<< Heliskiing | Articles | Skiing WorldWide >>